2D Scan
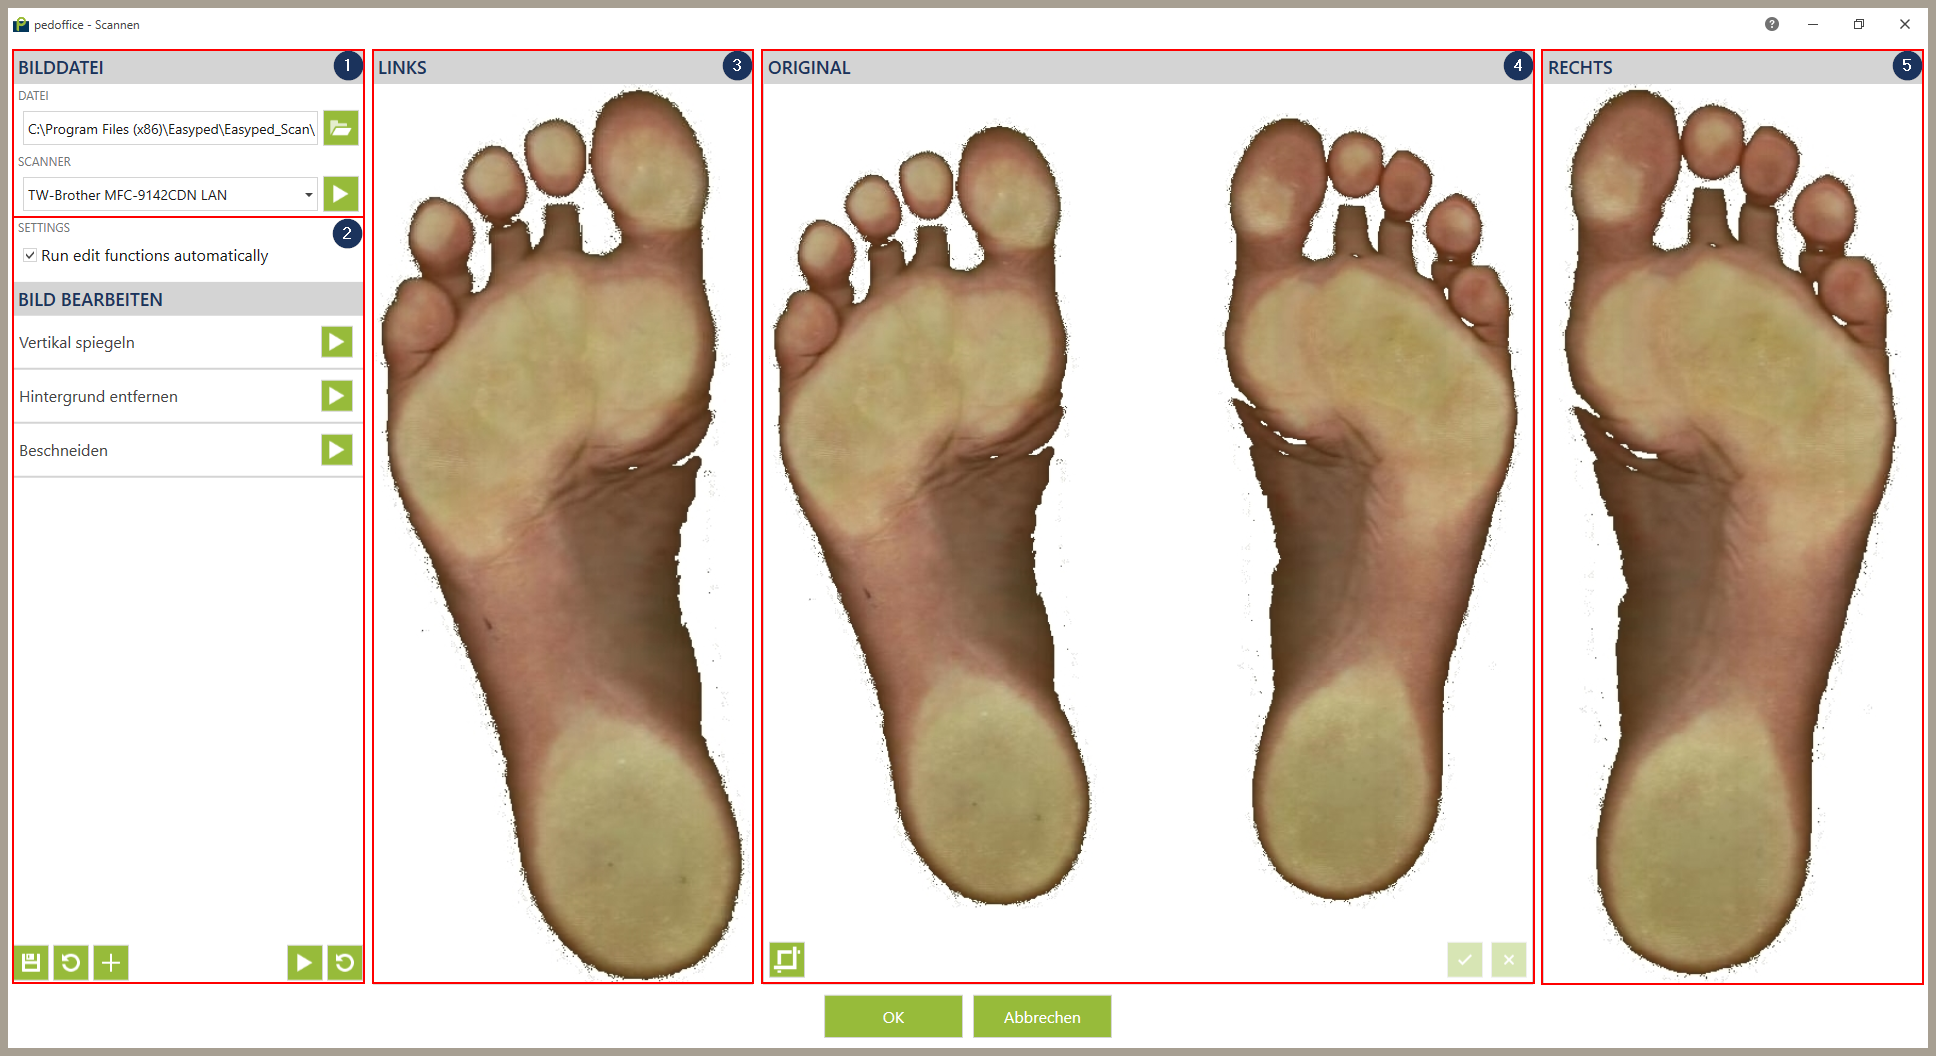
The scan window is divided into 5 parts.
| part Abb.1 | description |
|---|---|
| automatic image editing | |
| Result of the measurement of the left foot after editing. | |
| | Shows the scan result. |
| Result of the measurement of the right foot after editing. |

Für größere Ansicht Klicken
Image editing
If the checkbox „Run edit functions automatically“ ![]() Abb.3 image editing will be done automatically after scan or import. Alternatively you can click on
Abb.3 image editing will be done automatically after scan or import. Alternatively you can click on ![]()
![]() Abb.3 . If the result is not like you expected, you can reset the editing by clicking on
Abb.3 . If the result is not like you expected, you can reset the editing by clicking on ![]()
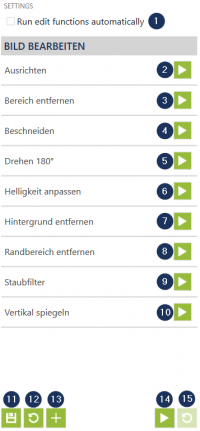
![]() Abb.3 . You can edit the image by yourself with the editing functions
Abb.3 . You can edit the image by yourself with the editing functions ![]() -
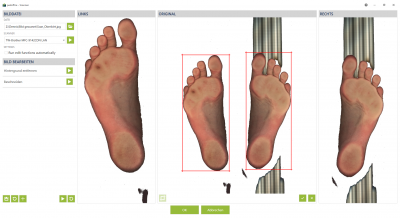
- ![]() Abb.3 . You can cut the measurement manually: click on the button
Abb.3 . You can cut the measurement manually: click on the button ![]() and adapt the red boxes arround the feetAbb .2 . Confirm your cut with
and adapt the red boxes arround the feetAbb .2 . Confirm your cut with ![]() or cancel it with the button
or cancel it with the button ![]() . If the result for the right
. If the result for the right ![]() Abb.1 and the left
Abb.1 and the left ![]() Abb.1 foot is like you expected, click on „OK“ to confirm.
Abb.1 foot is like you expected, click on „OK“ to confirm.

Click for larger view
All editing functions are optional and in the order freely configurable. Multiple addition is also possible. To edit an editing function click on it. The options open below. Click another time to hide them.

Click for larger view
To change the order of the editing functions click on ![]() Abb.3 to move the function up one position. You can move the function down one position by a click on
Abb.3 to move the function up one position. You can move the function down one position by a click on ![]() Abb.3 .
Abb.3 .
To delete a function click on the button ![]() Abb.3 .
Abb.3 .
To add an editing function click on ![]()
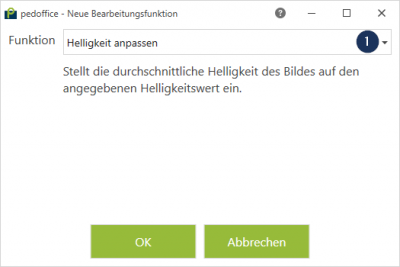
![]() Abb.3 . In the follwing windowAbb .4 you can choose the function
Abb.3 . In the follwing windowAbb .4 you can choose the function ![]() Abb.4 which should be added and confirm it by clicking „OK“.
Abb.4 which should be added and confirm it by clicking „OK“.

Click for larger view
To save your changes of the editing functions click on ![]()
![]() Abb.3 . You can restore the last saved settings by clicking
Abb.3 . You can restore the last saved settings by clicking ![]()
![]() Abb.3 .
Abb.3 .
Überschrift
| editing options | description | options | descriptipn of the option |
|---|---|---|---|
 | Align the image on the vertical axis. | „First time only“ | If active, this option will be executed only at the first time. |
 | Colors the specified area white. | upside | Start of the area to be removed, in pixels from top of the image. |
| left | Start of the area to be removed, in pixels from the left edge of the image. | ||
| width | Width of the area to be removed in pixels. | ||
| height | Height of the area to be removed in pixels. | ||
| „First time only“ | If active, this option will be executed only at the first time. | ||
 | Calculates the bounding box arround the non-white pixels and cut the image to fit in the box. | „First time only“ | If active, this option will be executed only at the first time. |
 | Turns the image by 180°arround the center point. | „First time only“ | If active, this option will be executed only at the first time. |
 | Sets the average brightness of the image to the specified brightness value. | brightness  | If active, this option will be executed only at the first time. |
 | Set background color to white based on the brightness of a pixel. Only value less than the lower limit and greater than the upper limit are changed to white. | Min. brightness | Specification according to RGB value range is 0 to 255. |
| Max. brightness | Specification according to RGB value range is 0 to 255. | ||
| „First time only“ | If active, this option will be executed only at the first time. | ||
 | Removing the specified border area. | upside | Numer of rows of pixels removed from the top of the image. |
| left | Number of rows of pixels removed from the left edge of the image. | ||
| right | Number of rows of pixels removed from the right edge of the image. | ||
| downside | Number of rows of pixels removed from the bottom of the image. | ||
| „First time only“ | If active, this option will be executed only at the first time. | ||
 | Remove all artifacts around the feet. This checks whether the brightness of a pixel is less than the ignored value. If so, it searches around the pixel for other pixels whose brightness is above the count value. If there are enough pixels, the pixel set to white. | size | maximum size of artifacts that will be removed in pixels. |
| border - ignore | Specification according to RGB value range is 0 to 255. | ||
| border - counter | Specification according to RGB value range is 0 to 255. | ||
| number | Number of passes of these machining options. | ||
| „First time only“ | If active, this option will be executed only at the first time. | ||
 | Flips the image vertically. | „First time only“ | If active, this option will be executed only at the first time. |
